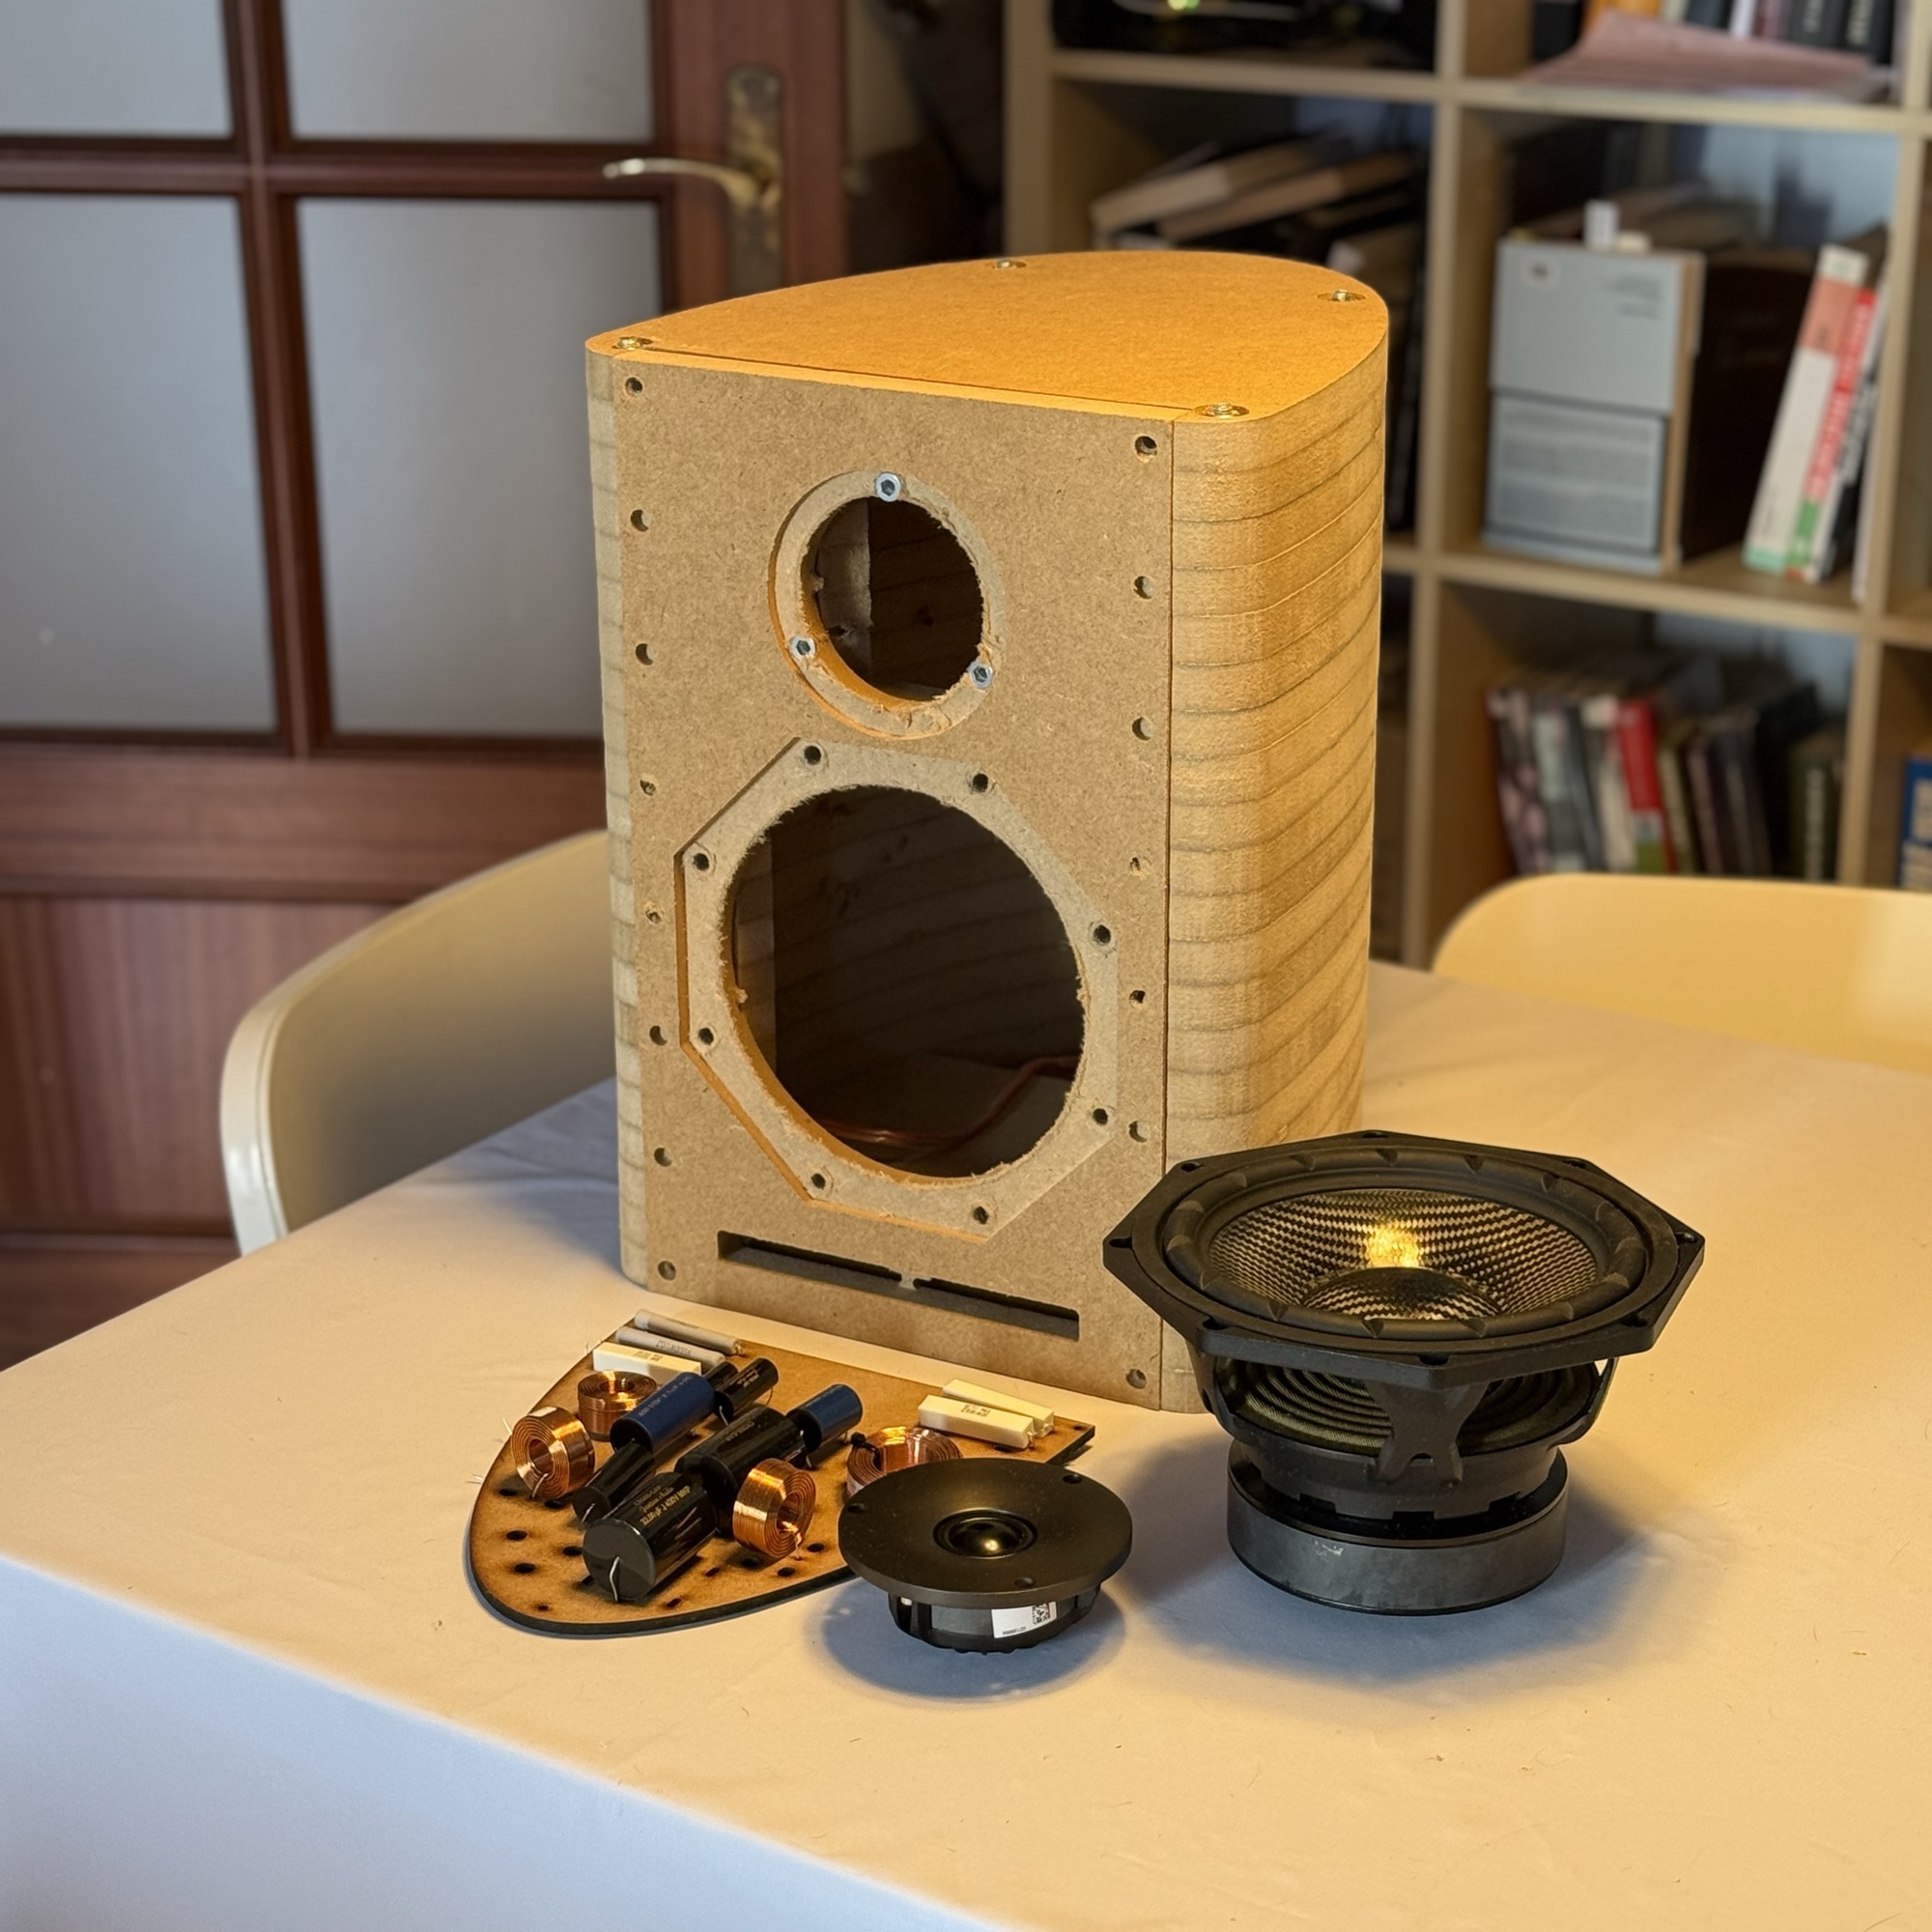
«Lira» geometry
A curved section with a flat baffle and an elliptical back. It removes parallel walls, spreads the internal resonant modes and breaks up standing waves.
First series in preparation
450 interestedA two-way loudspeaker built on one simple idea: put acoustic behaviour ahead of what mass production allows.
Drivers byBeymaKeep me posted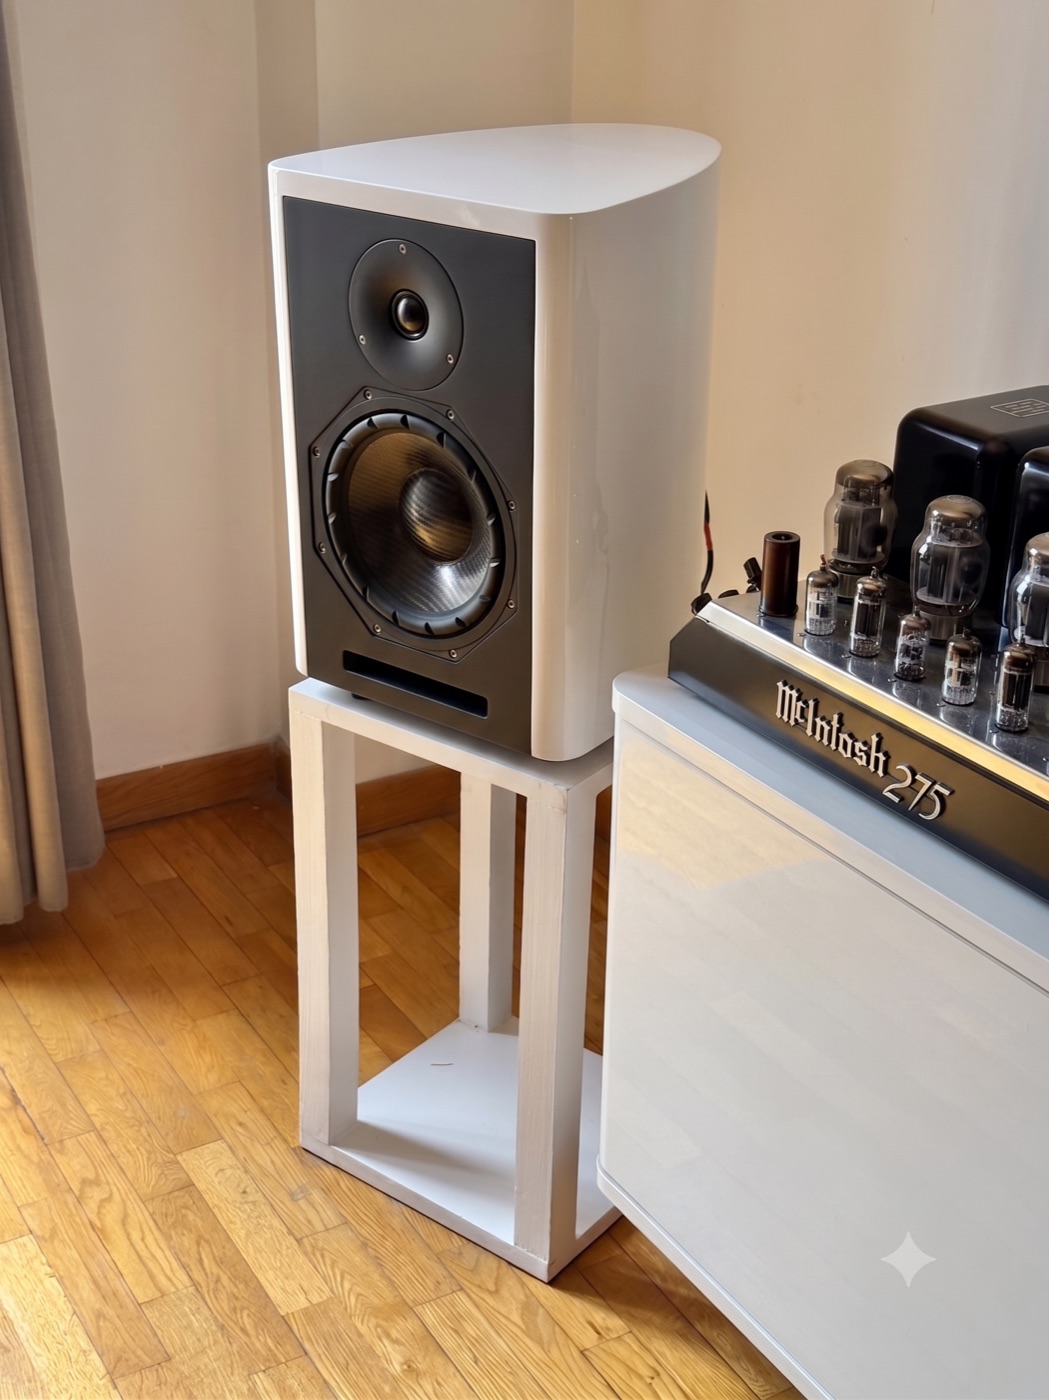
Inside the model
This is the actual CAD model the workshop DXFs come from: 120 parts, each with its place and its assembly order. Spin it, open it step by step and tap any part to see what it does and why it matters for the sound.
Project status
Deciding what the loudspeaker had to get right before drawing anything, choosing the drivers and taking the system into simulation.
The cabinet: curved geometry with no parallel walls, a 40 mm laminated body and every manufacturing drawing generated from a parametric 3D model.
Matching the crossover to the Beyma drivers to get everything out of them, settling the components and taking it from schematic to manufactured board.
Build, listen, write down everything that did not fit and draw it again. That is where the current design came from, now in high-precision machining.
The first measurements are done and published. What is missing is someone outside, with an anechoic chamber, confirming them.
Turning a prototype into something that can be manufactured, finished and sent to someone’s home without arriving damaged.
The project has been told in the open from day one. What is left is playing it in front of people and opening the first series.
The method
Loudspeaker design stopped depending on mysticism and intuition decades ago. Today there are simulation tools, analysis systems and a large body of literature that let you predict precisely how each decision affects the final result. The Opus I applies that accumulated knowledge.
Development focused on two critical goals:
That does not mean there is one correct sound: certain physical behaviours are statistically preferred because they cause less listening fatigue and stay closer to the original message.
The kit format as a philosophy. The kit brings back the audio culture of the sixties and seventies: building it is not only cheaper, it is how you get to understand the loudspeaker from the inside. The cabinet is not glued: the 23 layers are held by four threaded rods, and it can be opened and closed again. The drivers are from Beyma, who design and manufacture in Moncada (Valencia).
The design of the first series is fixed. One unit of the v11 prototype was measured on 8 October 2026 in Beyma’s semi-anechoic chamber, and the response, sensitivity, impedance and distortion figures on this page come from that measurement. Still to come: directivity beyond the 30° already measured, blind comparative listening against reference monitors on the market, and some fine adjustments, such as the port tuning.
Construction
Every geometric and material decision balances acoustic performance against what can realistically be assembled at home. The design is meant to make the result depend on the project, not on the previous skill of whoever builds it.
A curved section with a flat baffle and an elliptical back. It removes parallel walls, spreads the internal resonant modes and breaks up standing waves.
A structure made of 23 CNC-machined layers of 19 mm MDF. The front wall is 40 mm thick, the side and rear walls 30 mm. The layers are not glued: they are stacked and compressed, and the joints seal dry.
Four M8 steel threaded rods run through the body from top to bottom and keep it under pressure. They hold the layers without glue, so the cabinet can be opened and closed again.
The tuning duct is milled straight into the wooden slices themselves. It avoids the tube resonances of commercial plastic ports and keeps the tuning dimensionally exact.
An 8NMFW woofer (carbon cone) and a T25M dome tweeter. Professional-grade components, chosen for their low dynamic compression and thermal stability at high sound pressure.
Both drivers sit flush with the baffle in micrometric rebates. This minimises edge diffraction at the front.
The layers arrive numbered, except the base, and slide down the four rods in the marked order. All the M4 screws take a single 3 mm Allen key.
A passive crossover with air-core coils (no core to saturate) and polypropylene capacitors from Jantzen Audio and Dayton Audio. It includes impedance-correction and attenuation networks calculated for a clean transition between ways.
A custom rear terminal plate, laser-cut and engraved in 4 mm black acrylic, with four binding posts for bi-wiring. It sits flush in a rebate at the back of the cabinet.
Foundations
The Opus I is not based on esoterics; it rests on technical literature verified in primary sources (AES, JAES, BBC Research). The core references for the design are:
The brands mentioned belong to their owners and appear only as a technical reference.
Crossover
The crossover is the brain of the loudspeaker: it splits the signal coming from the amplifier between woofer and tweeter, sending each driver only the band it can reproduce and protecting it from the one that would damage it. But it does more than «cut»: it corrects the frequency response, matches the levels of the two drivers, compensates their impedances and aligns their phase so both sound like a single coherent source. That is why a well-designed crossover is the difference between a loudspeaker that measures well and one that also sounds natural. And the maths is not enough without good materials: air-core coils (no core to saturate), low-loss polypropylene capacitors and non-inductive power resistors keep the signal clean, stable at high volume and faithful over time. In the Opus I the crossover is passive, built from Jantzen Audio and Dayton Audio parts, measured piece by piece and mounted on a printed circuit board shaped like the cabinet itself.
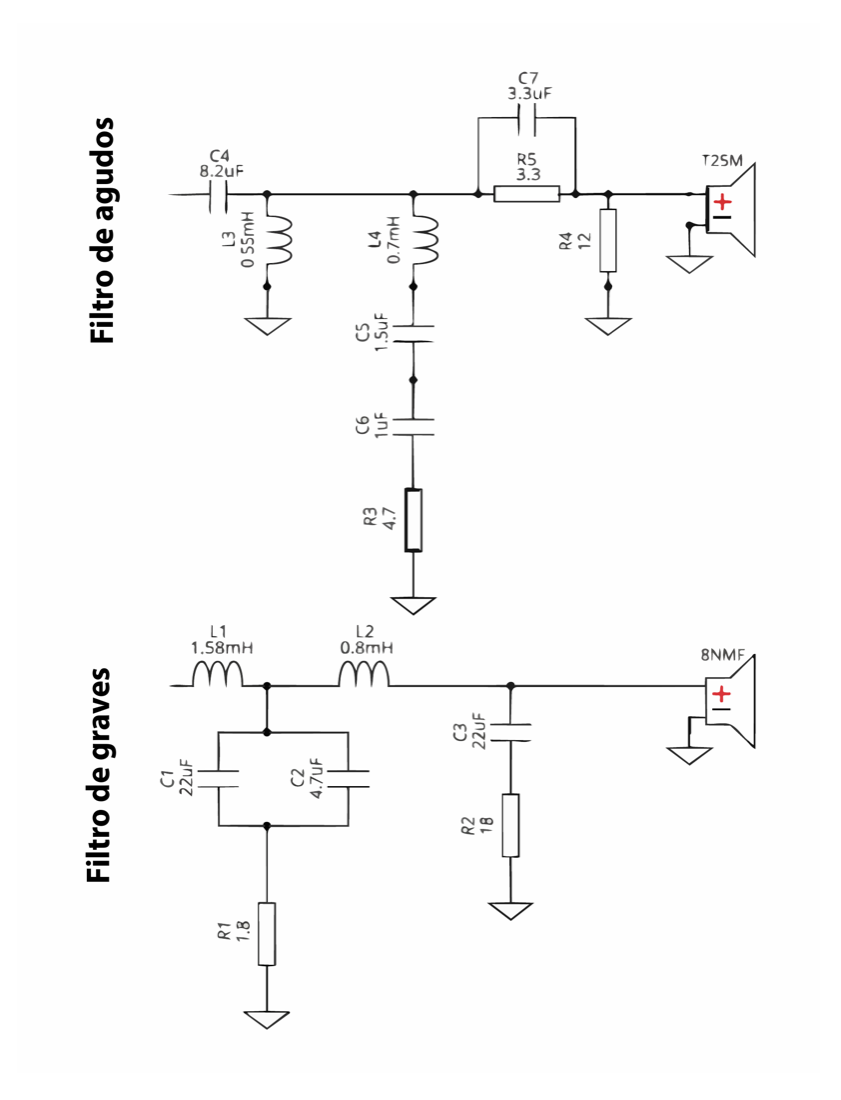
The two series coils (L1 1.5 mH and L2 0.8 mH) let the bass through to the 8NMFW and progressively hold back the treble. Capacitors C1 (22 µF) and C2 (4.7 µF) shunt what is left over to ground, and R1 (1.8 Ω) damps that network so the cut is clean and free of resonances.
C3 (22 µF) in series with R2 (18 Ω) forms a Zobel network at the woofer input. It corrects the impedance rise caused by voice-coil inductance, so the low-pass filter «sees» a stable, resistive load and works exactly as calculated.
C4 (8.2 µF) in series with L3 (0.55 mH) to ground forms a 2nd-order high-pass (12 dB/oct). It blocks the bass that would damage the T25M and passes only the top band it can reproduce.
L4 (0.7 mH) with C5 (1.5 µF) and C6 (1 µF) forms a series resonant network to ground that «sucks out» a specific peak in the tweeter response. R3 (4.7 Ω) sets the depth and Q of that trap, smoothing the curve without overdoing it.
R5 (3.3 Ω) in series and R4 (12 Ω) in parallel form an L-pad: they bring the tweeter level down to match the woofer sensitivity while keeping the impedance seen by the crossover constant. C7 (3.3 µF) bypasses R5 at the top end so the last octave keeps its air and sparkle.
Components

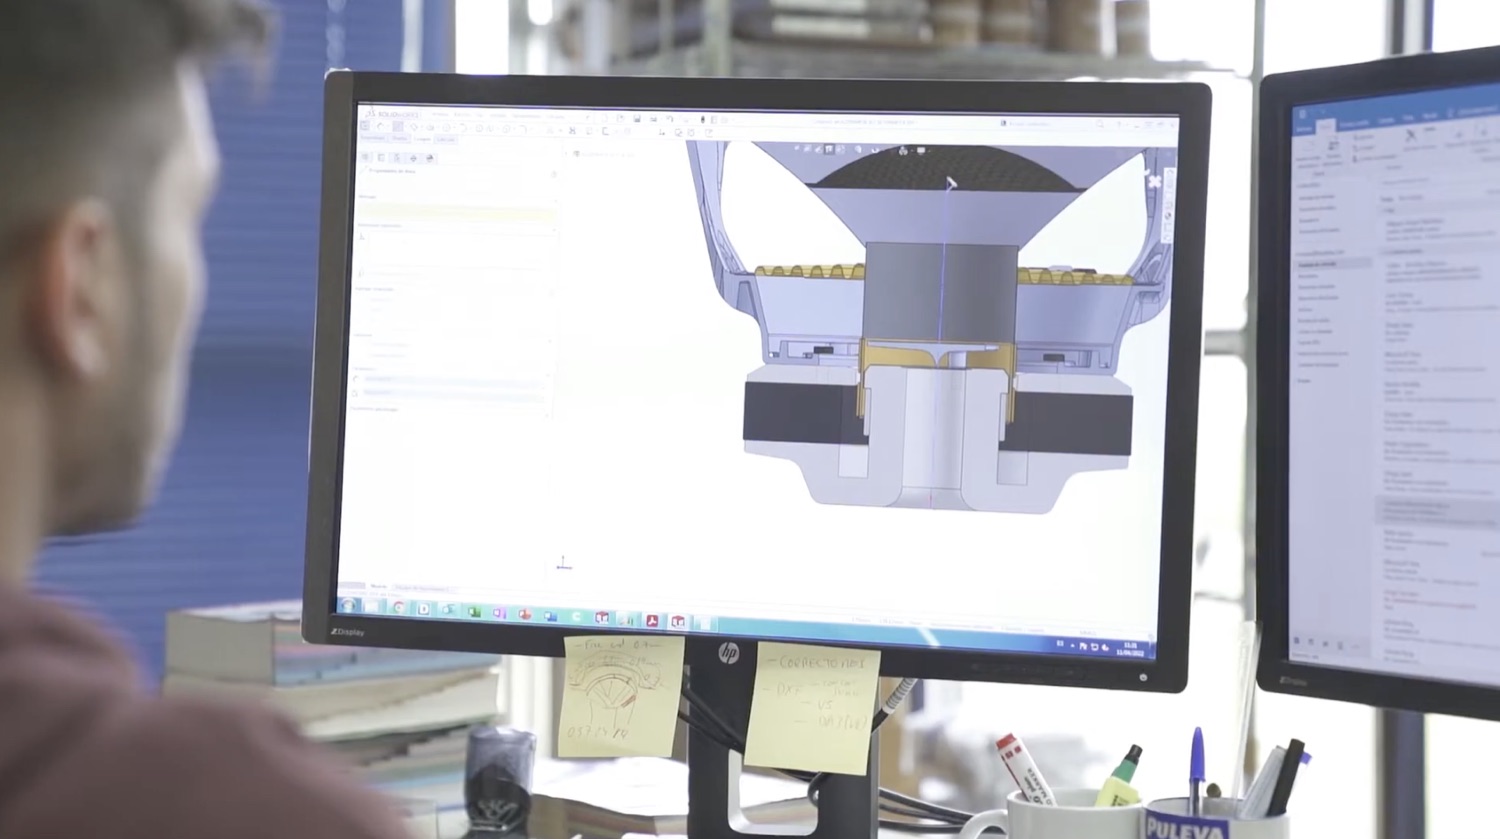
Both drivers in the Opus I come from Beyma’s NMF (Near & Mid Field) series: a new high-end range the Valencian manufacturer designed specifically for near and mid field —domestic high fidelity and recording studios. Developed over two years of multiphysics simulation in search of extreme linearity and minimal distortion, Beyma sums it up as «live sound at home».
Choosing the drivers is the decision that shapes a two-way design most: they are what moves the air. After comparing several brands, the drivers in the Opus I are Beyma, and not for a single reason.
Professional-grade components, not consumer catalogue parts. The NMF series comes out of two years of multiphysics simulation chasing linearity and minimal distortion: an honest base to build a good loudspeaker on.
Founded in 1969, Beyma is today one of the reference brands in professional audio in Europe. Behind every driver there are fifty years of accumulated craft.
Born for professional sound —tours, venues, studios— they take far more than you will ever ask of them at home. That ruggedness turns into peace of mind: a loudspeaker for years.
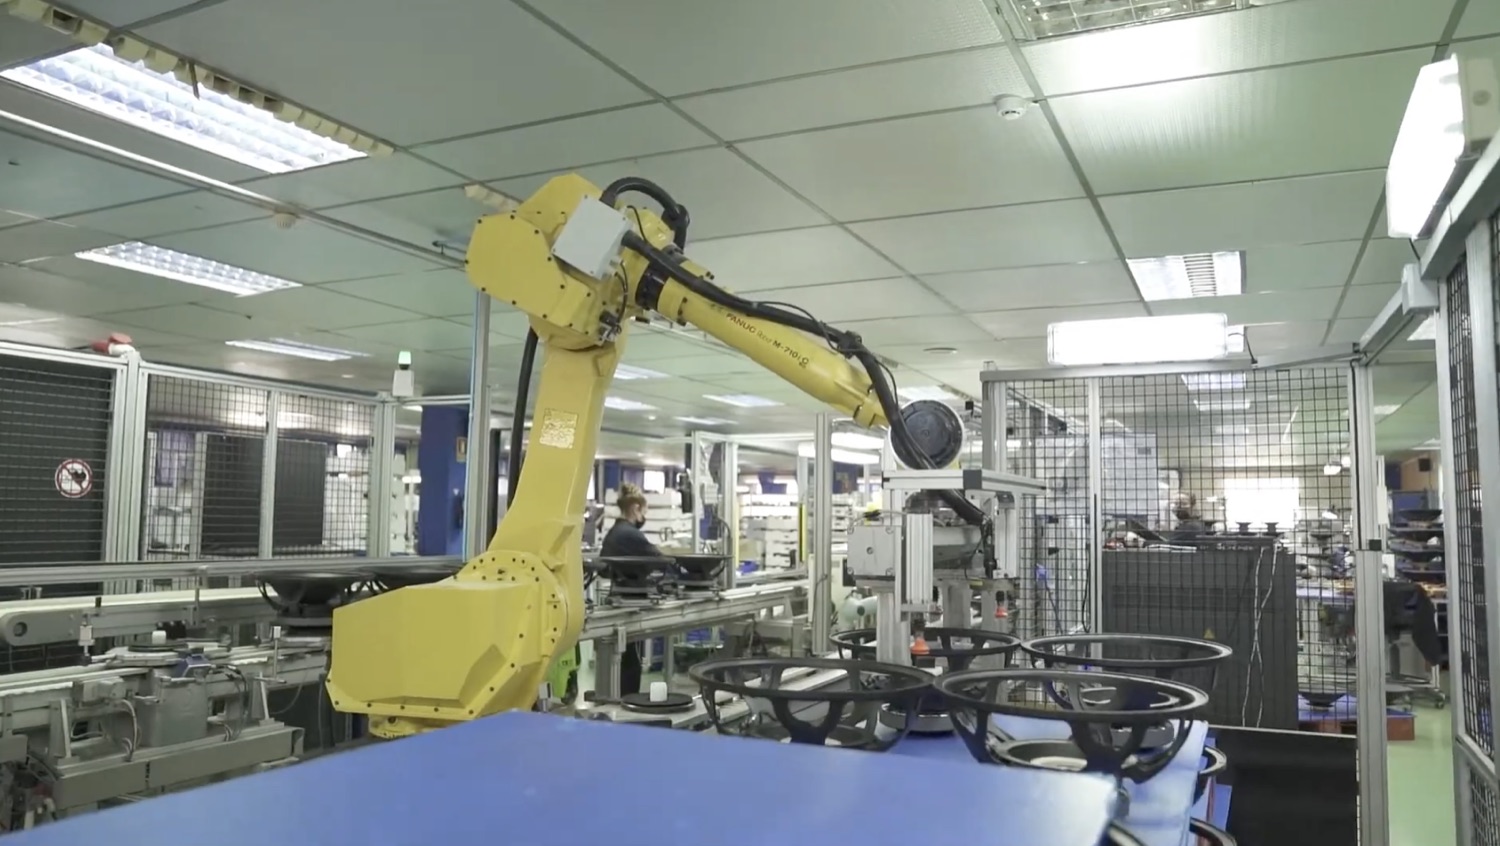
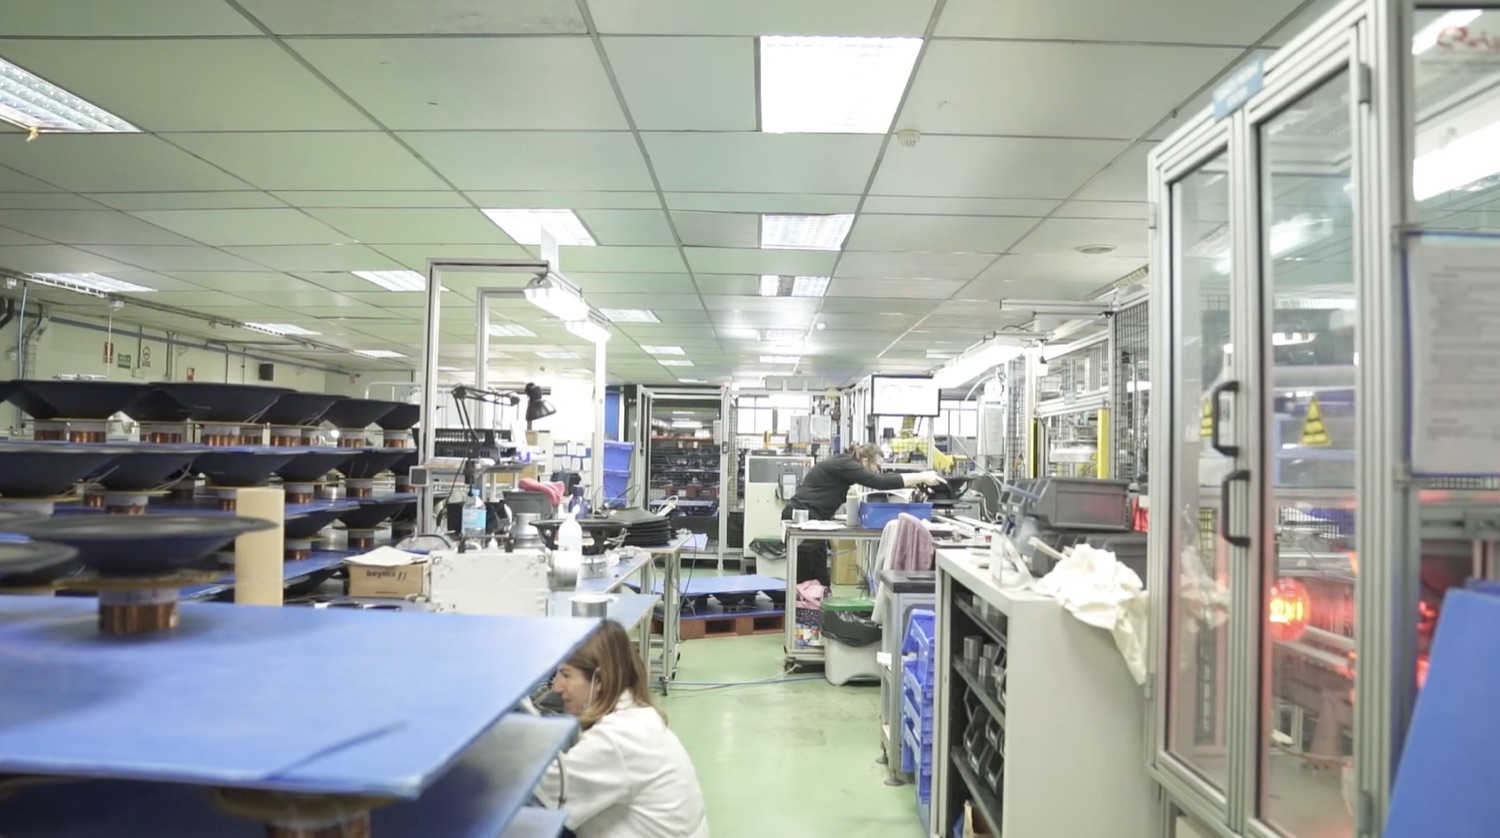
They design and manufacture in Moncada, Valencia. Working with a local manufacturer shortens distances and lead times, and keeps the project close to home.
In every contact, from engineering to sales, the same seriousness and the same good treatment. It is a pleasure to work with people like that.
But if I have to keep one reason above all the rest, it is the most human one: with Beyma you can talk. You pick up the phone and on the other end there are engineers, designers and a sales and communication team willing to discuss, to explain what you ask and to listen to what you propose. It is not a closed catalogue or a form that never gets answered. We are all people —and in the end, this is made by people for people.
Josep Maria Marimon
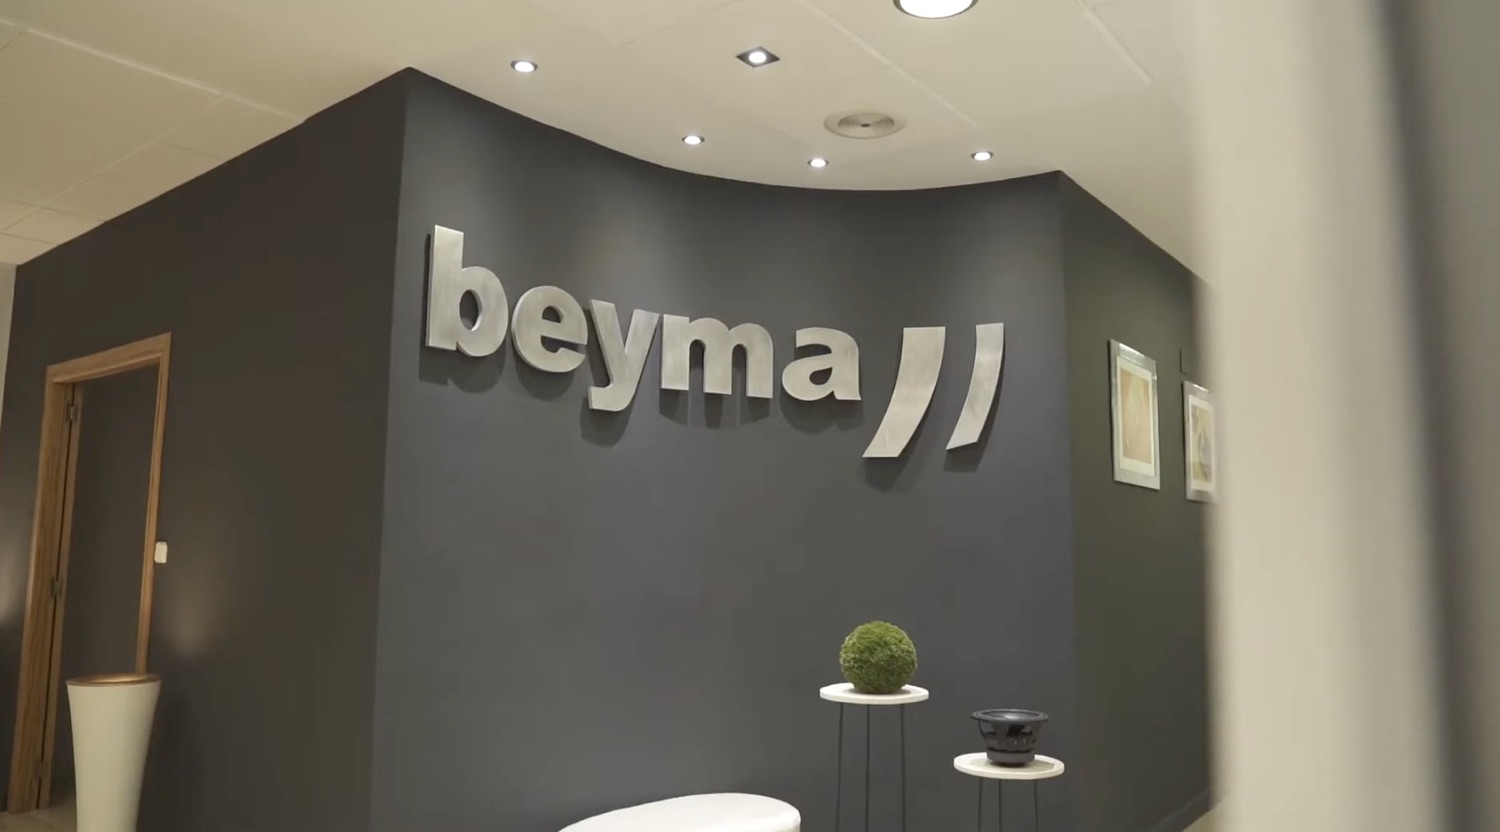
Beyma was founded in 1969, when the Masip family moved from Barcelona to Valencia to build loudspeakers. It designs and produces at its facilities in Moncada (Valencia). In 1974 it took its products to the Musikmesse fair in Frankfurt, and since 1976 it has exported across Europe; more than fifty years later it is one of the reference brands in professional audio.
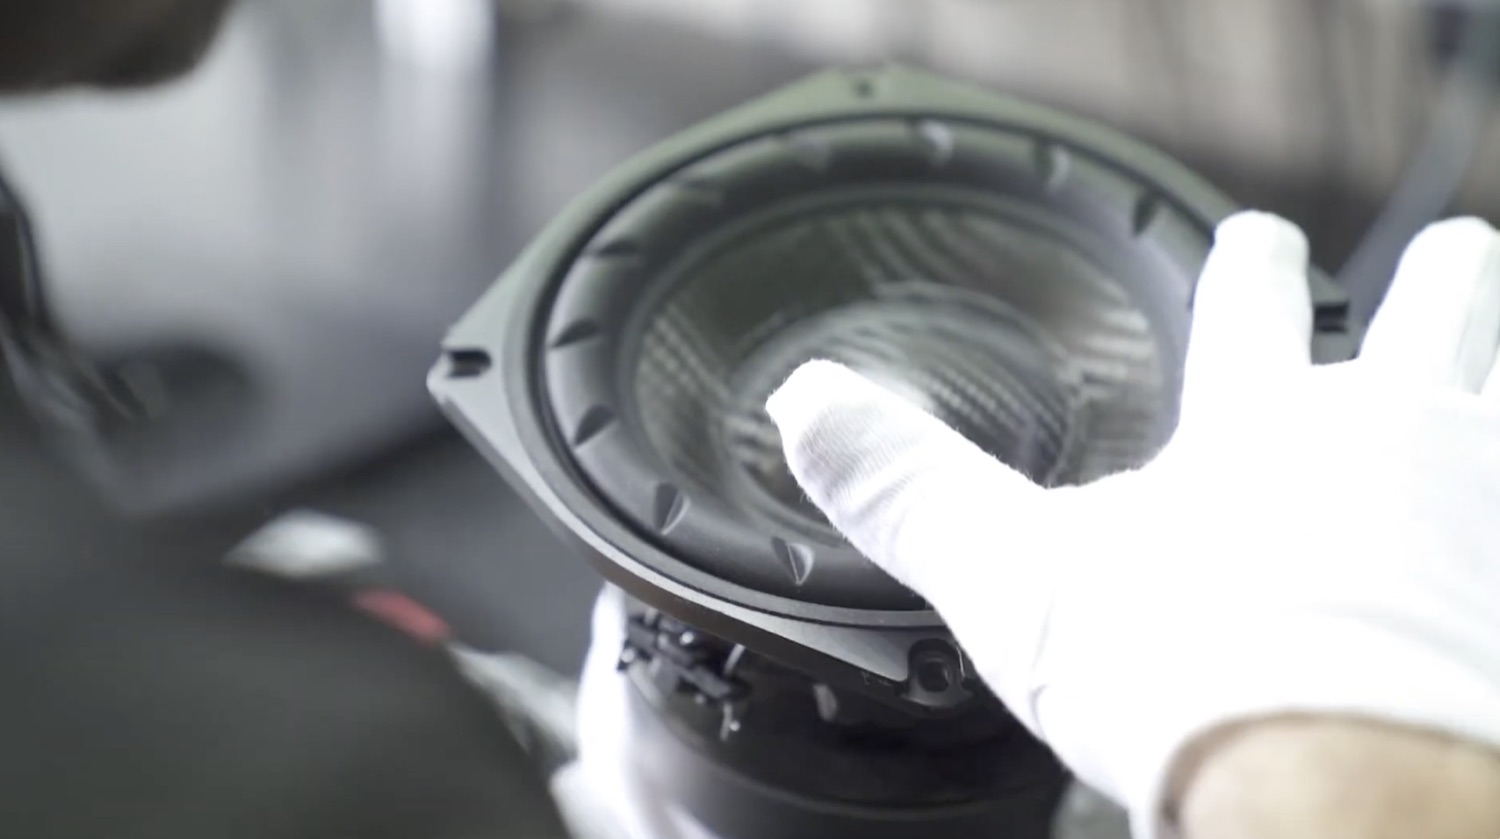
8″ woofer · low-mid
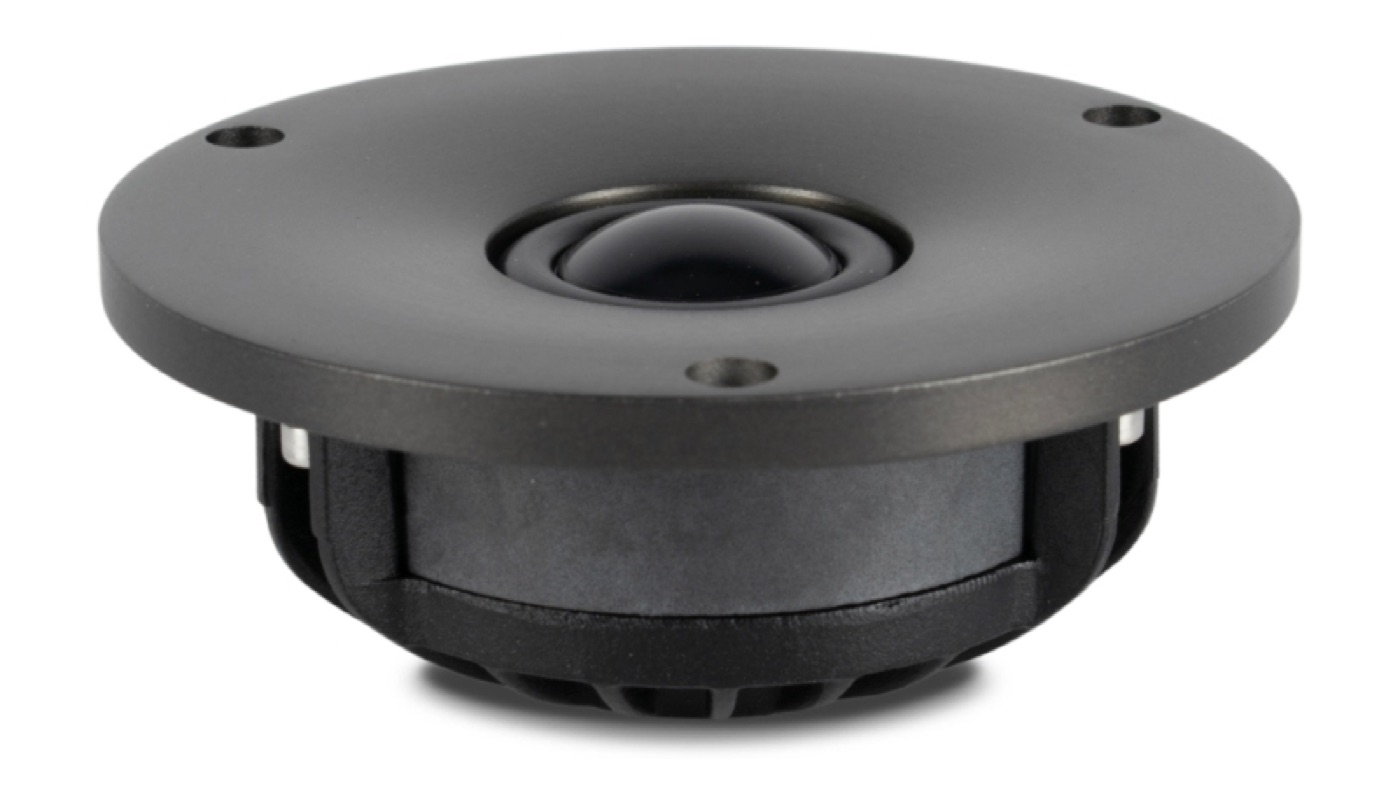
Dome tweeter · 1″
Measurements
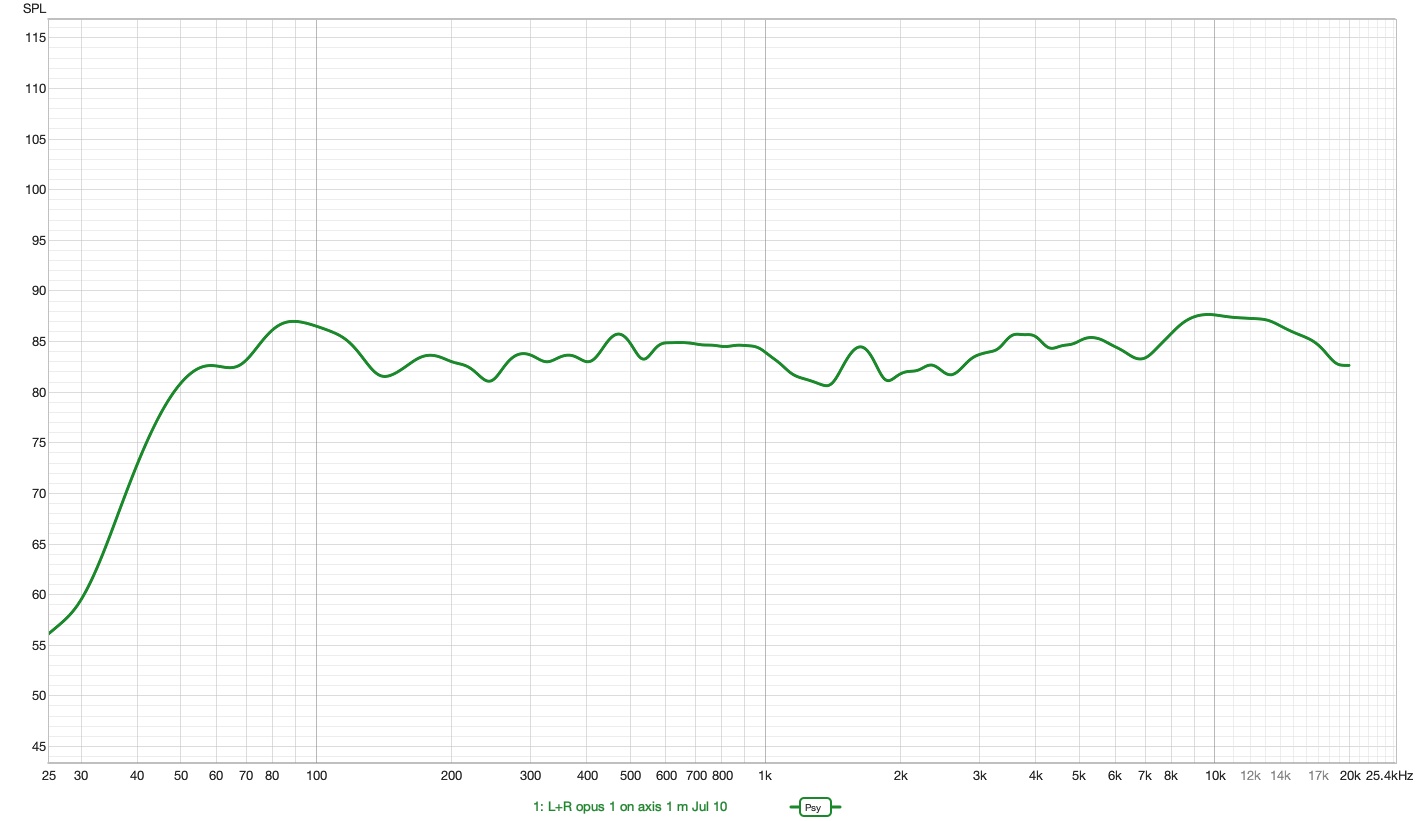
The figures in the spec sheet come from the measurement of one unit of the v11 prototype in Beyma’s semi-anechoic chamber (Moncada, Valencia) on 8 October 2026, at 2.83 V and 1 m. The plots below are earlier: they were taken in an ordinary room, with time gating, on a previous prototype, and are kept here to explain the method.
A loudspeaker is not «tuned by ear». It is measured, corrected and measured again, dozens of times, until the numbers confirm what you are after. That is what separates real design from opinion, and it is how any project that means to reach the market is done.
A loudspeaker is, above all, a translator: it turns an electrical signal into sound. Ideally it invents nothing —it gives back every frequency, from the deepest bass to the finest treble, with the same weight it was recorded with. When we plot its frequency response (sound level against frequency), that fidelity shows up as a line as straight and horizontal as possible.
Every deviation from that line is a lie the loudspeaker adds to the music. A peak makes one area —bright treble, swollen bass— sound louder than it should and take over the rest; in time it tires the ear. A dip does the opposite: it buries information that was in the recording and that we will now never hear. A flat loudspeaker is not a «cold» loudspeaker, it is an honest one: the character should come from the recording, the room and your taste, not from a loudspeaker that colours everything the same way.
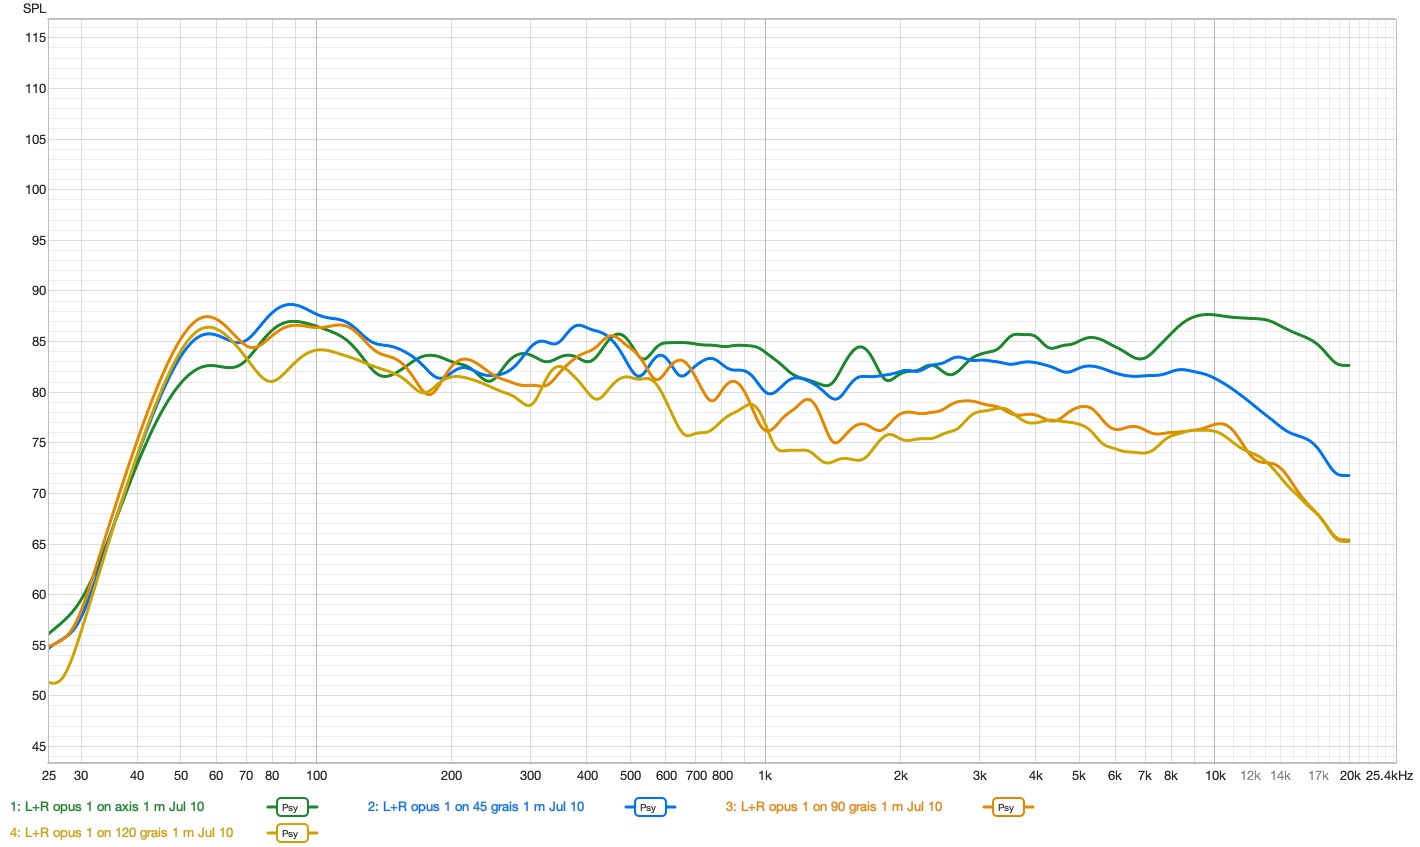
And it is not enough for the line to be flat right in front of the loudspeaker: what the sound does as it escapes to the sides and bounces around the room matters too (directivity). Toole and Olive showed that a flat on-axis response combined with directivity that falls off smoothly and progressively is, statistically, what listeners prefer in blind tests. That is the target behind every measurement.
Before spending a single euro on an anechoic chamber, the prototype is measured in an ordinary room. The problem is that walls, floor and ceiling send back echoes that dirty the measurement. The answer is not a perfect room but a rigorous method:
With this setup you enter the real working loop: measure, change one crossover value, measure again. Repeated dozens of times, this is what lets you tune the crossover until the target curve falls into place. The bass, where time gating stops being reliable, is measured separately in the near field and spliced onto the rest.
A semi-anechoic chamber is a room prepared so that sound does not bounce off the walls: the loudspeaker is measured almost as if it were in open space, without the limits of time gating.
On 8 October 2026, Beyma’s engineers measured one unit of the v11 prototype there with a Klippel system: on-axis and 30° response, impedance and distortion. The result: −3 dB at 41 Hz, ±2.3 dB from 50 Hz to 20 kHz on axis, 82.4 dB sensitivity (2.83 V / 1 m), 4 Ω nominal with a 3.9 Ω minimum, and distortion below 0.45 % above 100 Hz. Beyma later repeated the tests and got the same results. Directivity beyond 30° is still to be measured.
These plots are from an earlier prototype, measured in-room with time gating. The current figures are those from Beyma’s chamber.
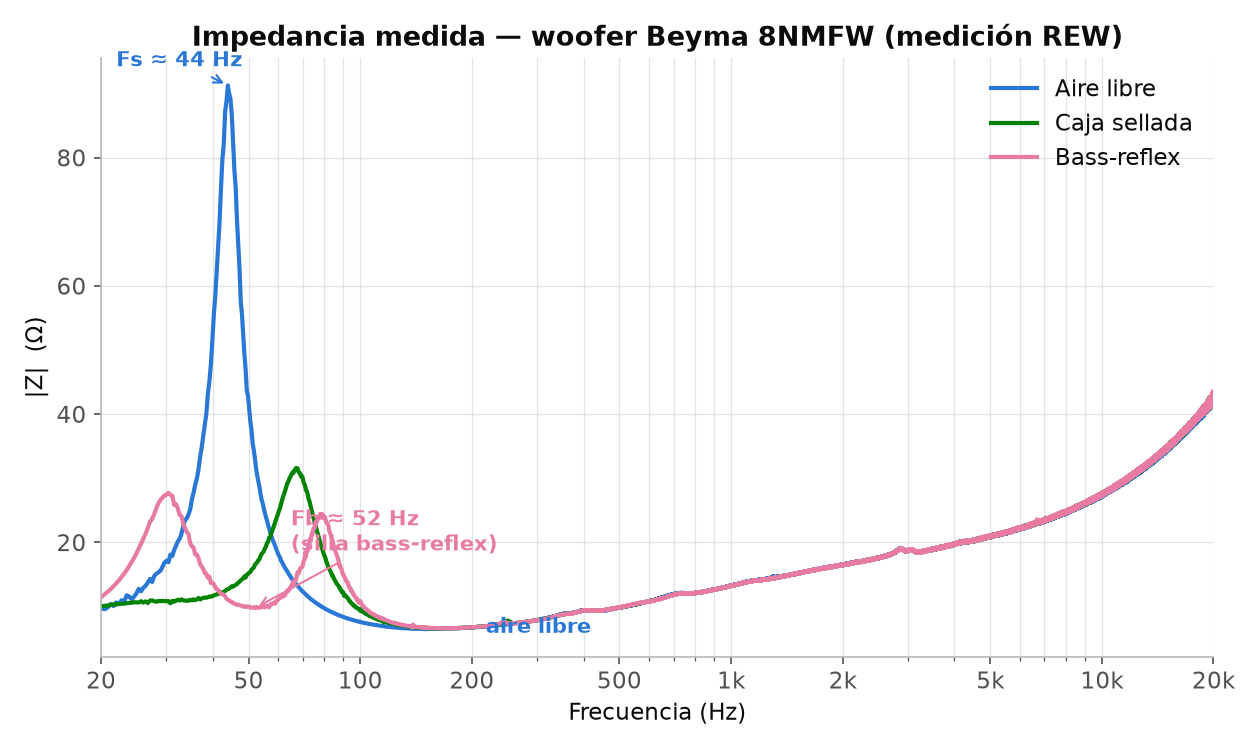
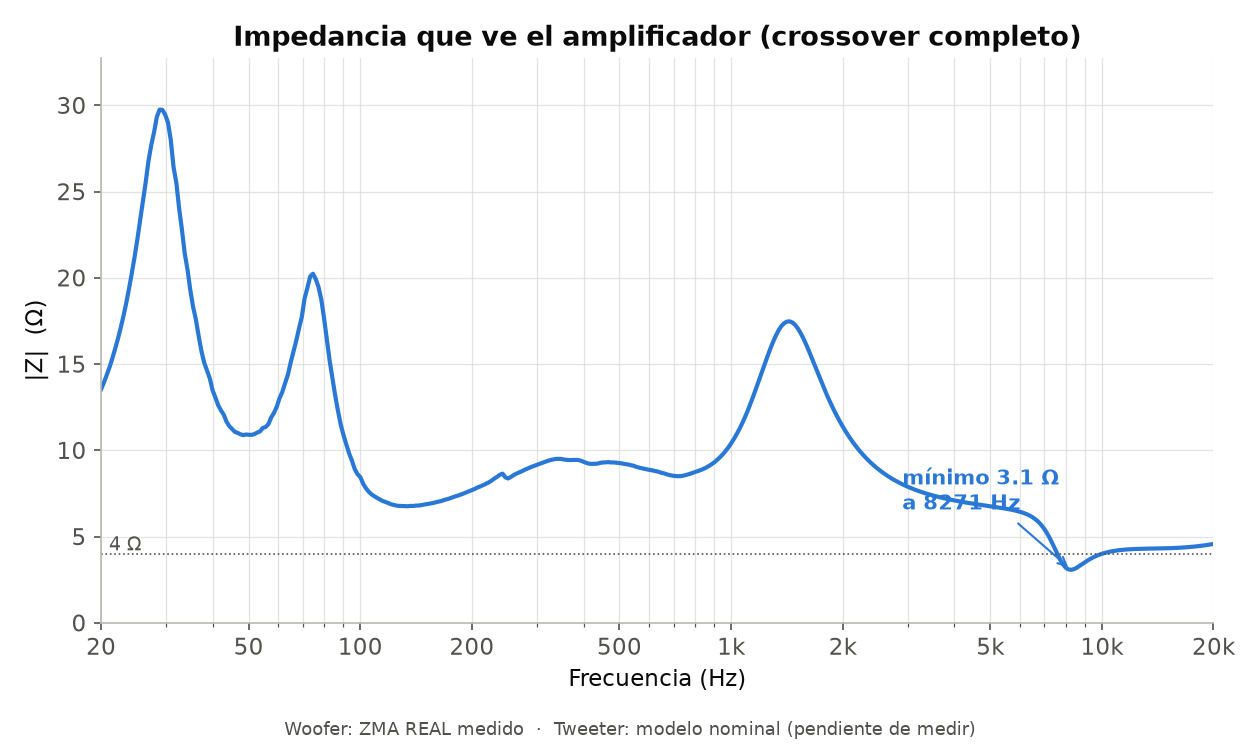
Impedance is the resistance the loudspeaker offers to the current the amplifier sends it, and it changes with frequency. Measuring it needs no anechoic chamber —an electrical setup with a reference resistor is enough— so, unlike the acoustic curves above, these are already final. These curves, however, come from an earlier prototype; the final system was measured at Beyma. And their shape is an honest X-ray of what happens inside the cabinet: where the woofer resonates, what frequency the port is tuned to, and what load the amplifier you connect will see.
These are electrical measurements of an earlier prototype, with a different volume and tuning. The current figures are Beyma’s: a 3.9 Ω minimum at 8 kHz and port tuning around 35 Hz.
Matching
It is the question that comes up most often and the one almost no manufacturer answers with numbers. Here they are: the Opus I is an easy load, but not a high-sensitivity loudspeaker, and the measurement in Beyma’s chamber puts numbers on both.
Recommended power
100 W
per channel into 4 Ω, solid state · 60 W or more with valves, from the 4 Ω tap
The Opus I is rated at 4 Ω nominal, not 8: the 8NMFW woofer is 8 Ω, but the T25M tweeter is 4 Ω and the system minimum with the crossover fitted drops to 3.9 Ω around 8 kHz (measured at Beyma) —a region where music carries very little energy. In the bass, where the amplifier is really asked for current, the load stays above 7 Ω. Any amplifier that claims stability into 4 Ω drives it comfortably, and today that is practically all of them.
The sensitivity measured at Beyma is 82.4 dB (2.83 V at 1 m), well below the 88 dB of the woofer on its own at that same voltage: that is the price of flat bass down to 41 Hz from a 22-litre cabinet. So the Opus I likes a powerful amplifier: we recommend at least 100 W per channel into 4 Ω, solid state.
The load is benign, with no extreme minima, so a valve amplifier drives it without trouble. But at 82 dB you need watts: we recommend at least 60 W per channel, from the 4 Ω tap.
The terminal plate has four binding posts: two for the bass and two for the treble. You can bi-wire or bi-amp if you want to explore that. With a single pair of cables, the bass and treble posts must be linked with a jumper.
Gallery
Real photographs of the build process in the workshop. No studio lighting and no retouching: the road from prototype to production.
Video
The build
Building the Opus I is not a carpentry exam. The design is worked out so the result depends on the project and not on the hands of whoever builds it: the layers are numbered and slide down four rods, the crossover arrives assembled and tested, and nothing is glued.
Two boxes, one per loudspeaker: the 23 numbered MDF layers, the baffle and the four M8 rods.
Two 8″ Beyma 8NMFW woofers and two Beyma T25M tweeters, in their factory packaging.
Both crossovers assembled and tested, the hardware sorted into bags by assembly step, the acrylic plates and the printed assembly manual.
The layers are numbered and slide down the four M8 rods one by one, in order and without glue. The crossover board, which arrives soldered and tested, is screwed onto the third one.
You tighten the four nuts with a 13 mm socket spanner, in two passes: gently first, then firmly. That compression replaces glue and clamps, and closes the joints between layers.
The crossover cables connect to the rear terminal plate with spade terminals: nothing to solder. The baffle is fixed with ten M4 screws over a butyl bead, which makes the seal.
Woofer and tweeter are screwed into their baffle rebates, each with its gasket, and sit flush with the wood. You connect the spade terminals, watching polarity, and close it up.
The cabinet arrives in bare MDF, ready to paint, lacquer or treat. This part is yours: it is where the kit stops being a product and becomes yours.
Open source
We believe in shared knowledge. The crossover schematic, the component list and the driver data sheets can be downloaded here.
Passive crossover with Jantzen Audio and Dayton Audio components.
Official Beyma datasheets for the drivers in the kit.
How to get one
The Opus I will come in two formats: the Kit, to build it yourself and get to know the loudspeaker from the inside, or the assembled, lacquered version, ready to play.
In preparation First series
Made to order
The first series of the Opus I is in preparation. Leave us your contact details and we will let you know as soon as it can be reserved.
Option 1 · Kit
You get the Opus I in four boxes and assemble it yourself, with the step-by-step manual.
Option 2 · Assembled
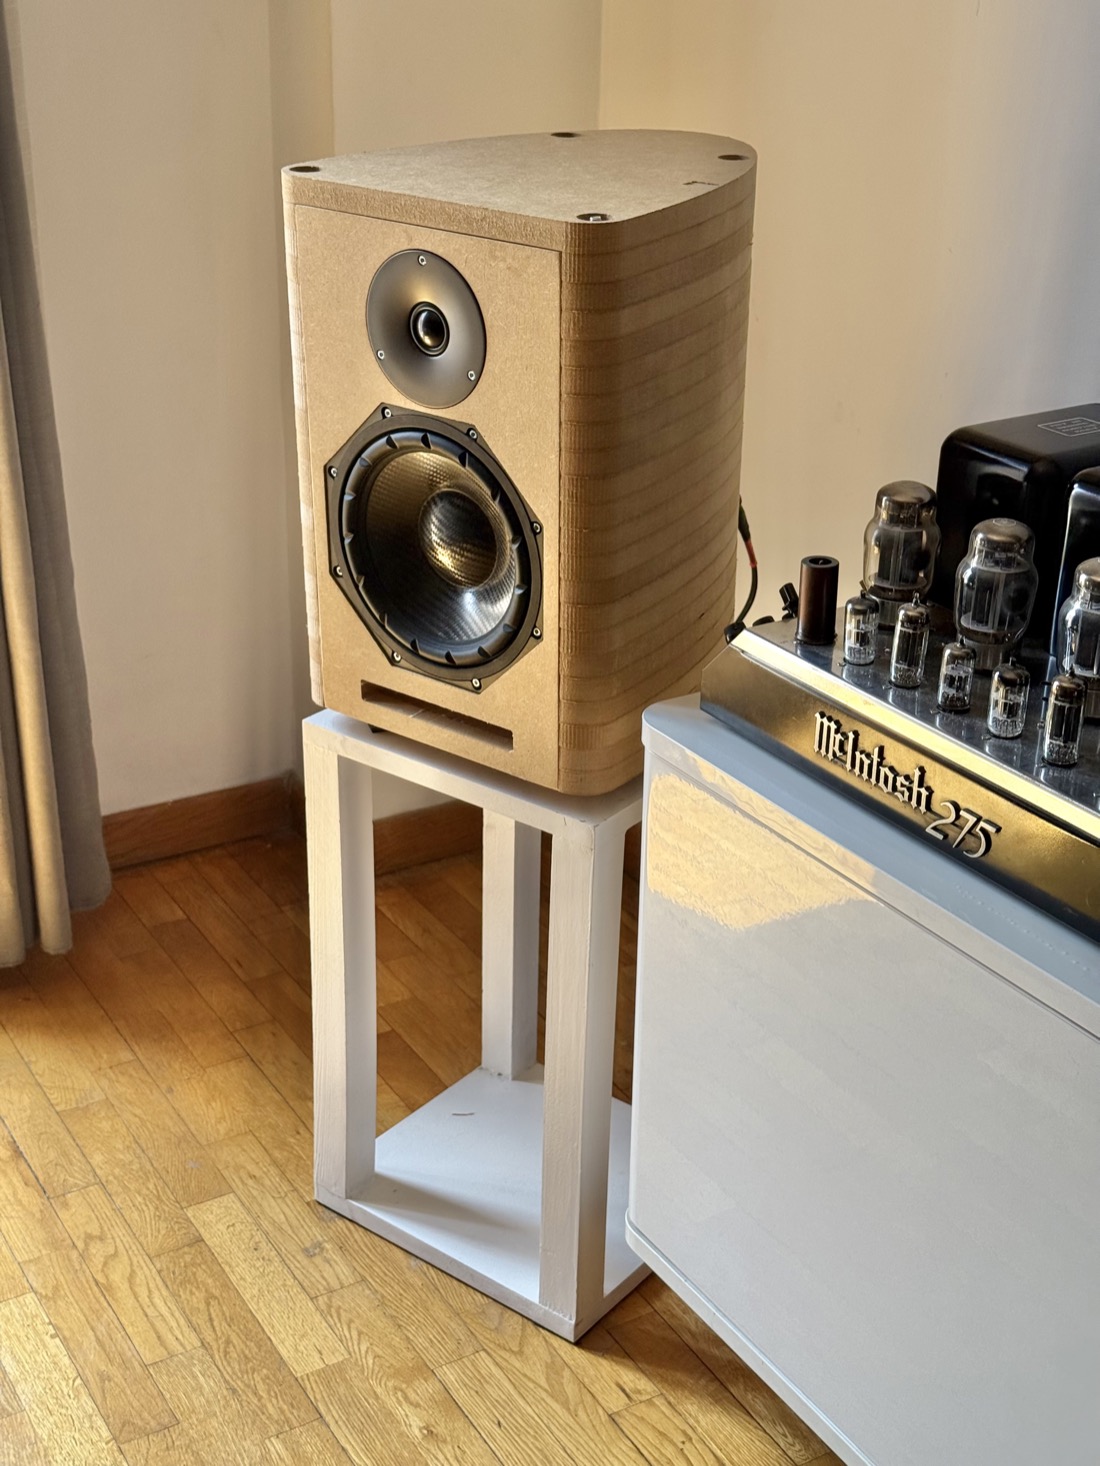
You receive the pair assembled and lacquered in white, ready to place and connect.
If you already own part of the system or prefer to build part of it yourself, the cabinet and the crossover will also be offered separately.
Questions
The first series of the Opus I is in preparation. It will come in two formats: assembled and lacquered, or as a kit. The design is that of the first series —the «Lira» cabinet, the Beyma drivers and the crossover you see in the specs— and one unit of the v11 prototype was measured in Beyma’s semi-anechoic chamber on 8 October 2026. It will be made to order. You can follow the state of the project on the timeline at the top of this page.
It depends on the format. The images of the lacquered version on this page are simulations, not photographs.
That is the reasonable worry of anyone considering a kit, and the design is built around it: the layers are numbered, except the base, and slide down the four rods in the marked order. The crossover arrives assembled and tested, so there is nothing to solder and nothing to calculate. Because the body is not glued, a mistake can be put right: you loosen the nuts, reposition the layer and tighten again. And if you get stuck, you write straight to the designer: there is no customer service department in between.
No. The build needs no soldering, no glue, no clamps and no special tools: a 13 mm socket spanner, a 3 mm Allen key and a screwdriver are enough. The «The build» section on this page has the detail on tools and what is in each box.
The Opus I is designed in Barcelona and the drivers are from Beyma, who design and manufacture in Moncada (Valencia). The CNC machining of the cabinet is done by Nord Taller, a craft workshop, and the lacquering in a workshop in the Barcelona area.
Yes, the 3-year legal warranty. And since it is hand-made by its author, anything that comes up is dealt with directly, with no middlemen.
Public presentation
September 2026
The Opus I was first shown in public at the Stereo Vintage Barcelona fair. If you want to hear about the next listening sessions, leave me your contact details.
Log in for more features


Community
Questions and answers
The channel is open to discuss simulations, suggest changes or sort out technical questions directly with the designer.
Join the Opus I community
Come into the project group to follow the build, share your own progress and sort out technical questions directly with the designer.
0 comments
Sign in to ask or comment.
Sign inLoading…